Google’s Sitelinks Searchbox, with or without Yoast SEO

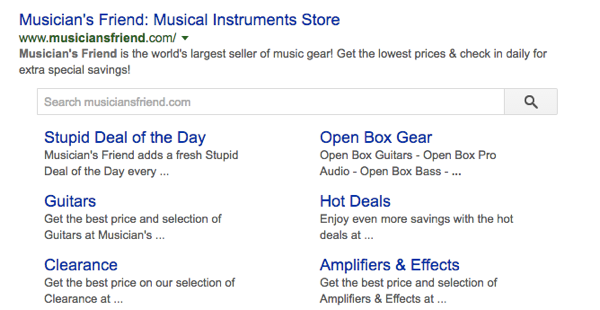
A couple of years ago, Google introduced the Sitelinks Searchbox. When activated, this search box appears under the main URL for a given brand in the search results, above its sitelinks, hence the name. When you search for that brand on Google, you can directly use the site’s search engine. The results will be presented on the search results page of the relevant site.
On November 29, 2024, Google deprecated the Sitelinks Searchbox. The following information will no longer apply.
How to add a Sitelinks Searchbox to your site
It’s not that difficult to make your site eligible for a Sitelinks Searchbox. The process consists of just three steps, and if you are a Yoast SEO user, it is even easier. This process takes care of the technical side, but, in the end, Google determines if your site gets a Searchbox. To be honest: Google does not show this Sitelinks Searchbox for most sites. So, let’s run through the required steps:
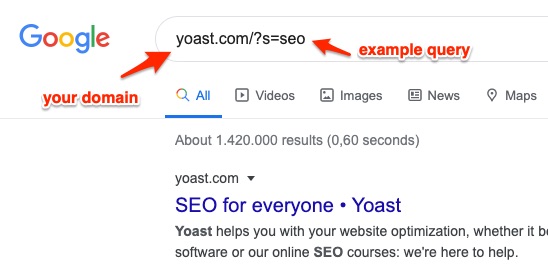
- Verify you have a functioning search engine
For 99.5% of WordPress sites, this one is simple: you type example.com/?s=query (replacing example.com with your site’s URL and query with the query of your choice), and you should see search results. If you don’t see search, and you’ve not made a conscious decision to move your search engine elsewhere, you might need to fix your theme.
- Add the necessary markup (Yoast SEO does this automatically)
Adding the markup is simple if you’re on WordPress and use Yoast SEO. In that case, all the necessary code will be added automatically. There are exceptions of course: It could be that you don’t use the default search engine, in that case, you’ll need to change the URL using the built-in filter.
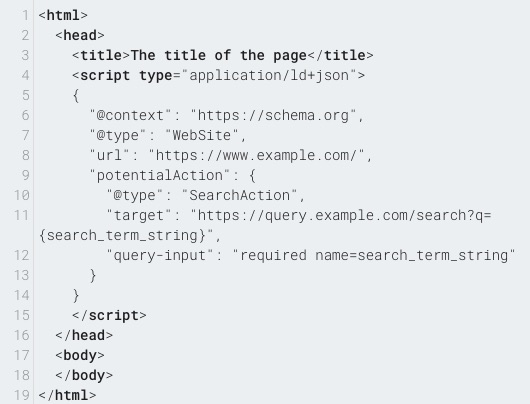
If you don’t use Yoast SEO, you can add the necessary code by hand via a piece of Schema.org structured data. The screenshot below shows a piece of example code from Google’s documentation, in this same document you’ll also find the requirements for a valid technical implementation. This uses JSON-LD to mark up the code in an efficient and readable way.
- Set up a preferred canonical URL for your homepage (Yoast SEO does this automatically)
Step three, and again, this one is easy. Google uses the canonical to determine the correct URL for your site. When you use Yoast SEO, this canonical will automatically be set for you. If you want — or need — to do it by hand, you can read up on canonical URL’s in our ultimate guide to rel=canonical.
When you have done all of this and Google deems your site eligible, you might see something like the example above in the search results.

Check the Sitelinks Searchbox results in Google Search Console
A few days after enabling this you should have a Sitelinks searchbox report in Google Search Console. For those of you who have had Yoast SEO for a while, this report should already be there. If there are errors in that report, find out what they are and fix them. If not it’ll look something like this:
