Configuration guide for Local SEO
Our Local SEO plugin helps you rank in local search results, Google Maps, and the Knowledge Panel. This guide helps you configure your Local SEO plugin correctly.
Unsure how to properly represent your company? Google has some great guidelines for representing your business in search results. Want to learn all about Local SEO and improve your rankings in the local search results? Check out our Local SEO training now!
Where to find the Local SEO settings
When you’ve installed and activated the Local SEO plugin, follow the steps below to find your Local SEO Settings.
- In your WordPress Dashboard, go to Yoast SEO

- Go to Local SEO
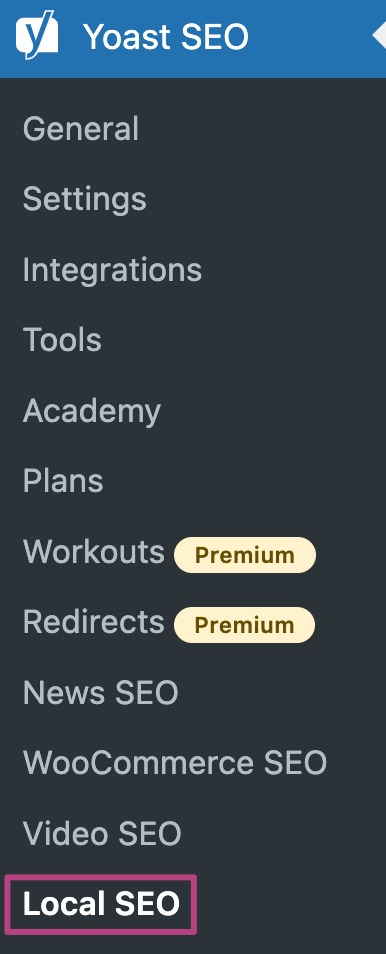
The Local SEO settings
Once you’ve found the Local SEO settings, it’s time to configure them correctly for your business, so the Local SEO plugin can help you rank better in the local search results.
The Local SEO settings consist of five tabs: Business info, Opening hours, Maps settings, API key, and Advanced settings. We’ll discuss these tabs below.

Business info
In the Business info tab, you can set up the location of your business. This information will be used in the search results and can be used to add contact information or a map to your website. If you operate a service-area business, you can set this area under Business info details.
The first thing you need to do is indicate whether your business has multiple locations, by switching the toggle below. The rest of the Business info settings depend on whether your business has a single location or multiple locations.

My business has a single location
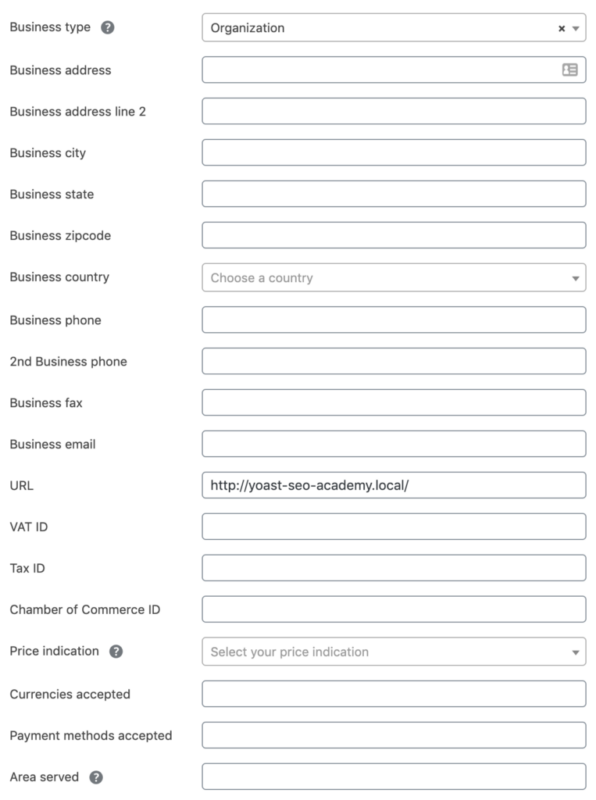
If your business only has a single location and you’ve switched the multiple locations toggle to No, you’ll see the settings below.
First, set up your company name and logo under Site representation by following the link.

Then, enter your location details by filling in the sections. Most of these fields are self-explanatory, like name and address. We’ll discuss some of the other fields below.
My business has multiple locations
If your business has multiple locations, switch the toggle to Yes and click Save changes. Now, Yoast SEO will automatically create a new Custom Post Type where you can manage your locations.

Setting up a primary location and shared business info
When you switch the multiple locations toggle to Yes, you will see additional options. If all your locations are part of the same business, switch the toggle to Yes. This will reveal the setting for the primary location and the shared business info.
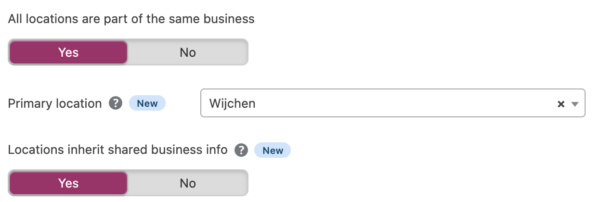
You can set the primary location of your business by choosing the correct location from the drop-down menu. Your primary location should be your head office or a similar location. By configuring this setting, you allow the Local SEO plugin to output the correct structured data for your business.
The multiple locations of your business may also have shared business information, such as the same e-mail address, website, and business type. With Local SEO, you can add shared business information to all locations at once.You can also override the shared information for a particular location if only some details are different.
Business info details
Below, we’ll discuss some of the Business info fields. These fields are the same for single and multiple locations.
- Business type: enter the business type that best describes your business. If there are no options that best describe your business, we suggest going with Local business. Learn more about different business types.
- VAT-ID/TAX ID/Chamber of Commerce ID: text fields where you can add your company’s IDs, depending on the location of your business.
- Price range: the price range field has multiple options from $ (cheap) to $$$$$ (expensive). The selection should cover the majority, if not all of the products offered by your store or location.
- Currencies accepted: this field allows you to enter the currencies that are accepted by your company. This is a text field that has no restrictions. The schema documentation recommends using ISO 4217 currency format for best results.
- Payment methods accepted: this field allows you to enter the payment methods that are accepted by your company. This is a text field that has no restrictions.
- Area served: this field allows you to enter the geographic area where a service or offered item is provided. This is a text field that has no restrictions, and uses the
areaServedproperty. You can find on Schema what types of area you can fill in. If you enter multiple areas, use a comma to separate them. For example, New York, Seattle, or, Germany, France.
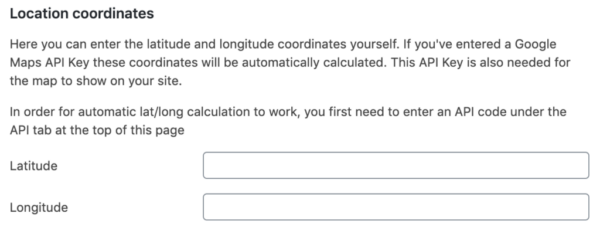
Location coordinates
Here, you can enter the location coordinates of your business (latitude and longitude). When you enter a Google Maps API key under API key, these coordinates will be automatically calculated.
Address format
Address formats are different in different countries. These settings allow you to select the right address format for your business.

Adding new locations
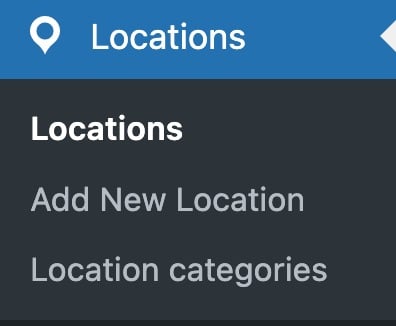
When you select multiple locations, the plugin creates a new custom post type to add new locations. In the menu on the left-hand side, go to Locations. To add a new location, click Add New Location and enter the details. This will serve as a landing page for the individual location.
You can customize the page with information about your location. There are shortcodes available for your convenience, for the address, map, opening hours, and store locator.
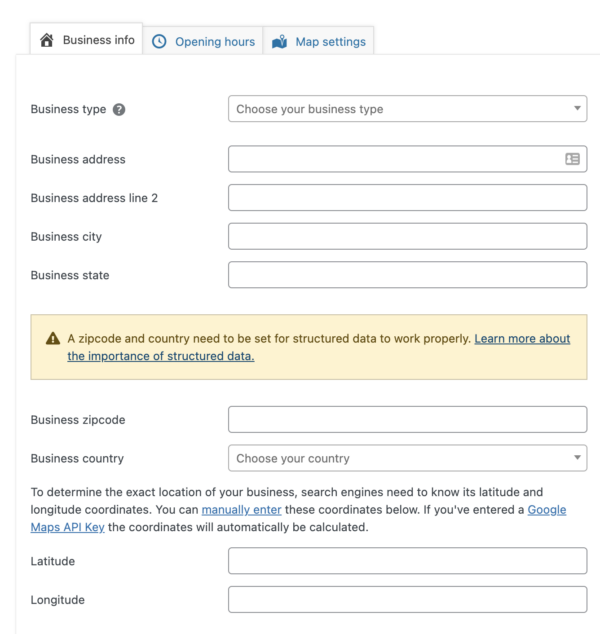
In the editor, you can open the Yoast Local SEO metabox at the bottom of the page.

These Yoast Local SEO metabox containts Business info, Opening hours, and Map settings.
Opening hours
The next tab (both for single and multiple locations) is the Opening hours tab. The options differ for Opening hours for a single location and Opening hours for multiple locations.
Opening hours for a single location
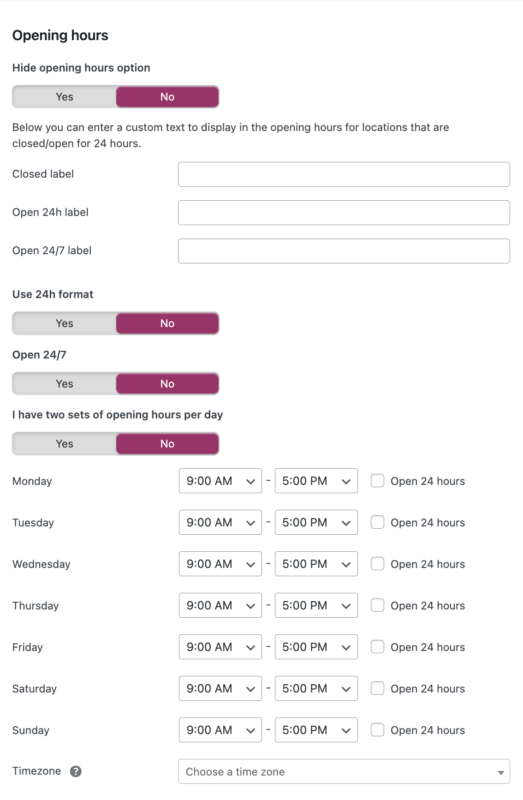
For a single location, the opening hours settings are in the Local SEO settings. Here, you can choose to show or hide the opening hours option. If you show the opening hours, you can enter a custom text to display in the store locator. You can also indicate whether you want to use the 24h format, whether your business is open 24/7 and whether you have two sets of opening hours per day. Finally, you can enter the opening hours per day.
Opening hours for multiple locations
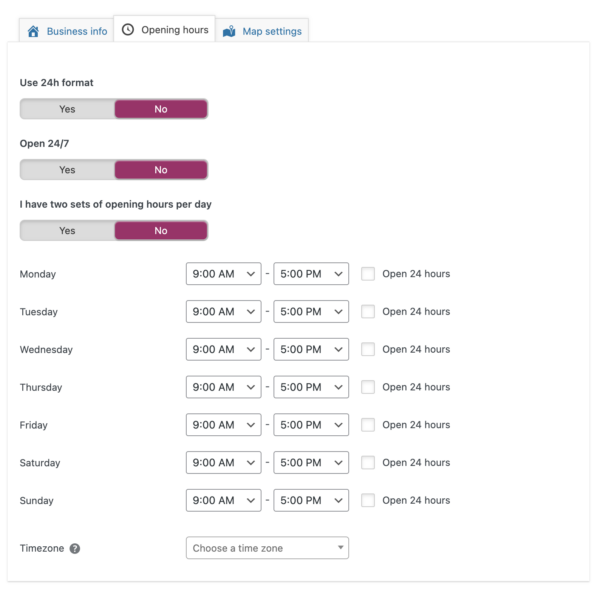
If your multiple locations have shared opening hours, you can fill in those hours in the Opening hours tab. Toggle the Locations inherit shared opening hours setting to Yes to do so. If you have different opening hours per location, you can override the shared opening hours settings by editing the opening hours in the Location post type for that location.

If all your locations have different opening hours, you can switch the Locations shared opening hours toggle to No. Then, you can set each location’s opening hours in the Opening hours tab in the Locations post type. There, you can indicate whether you want to use the 24h format, whether this location of your business is open 24/7 and whether you have two sets of opening hours per day. Finally, you can enter the opening hours of this location per day.
Maps settings
The next tab shows the Maps settings. To enable these settings, you’ll first have to set an API key.
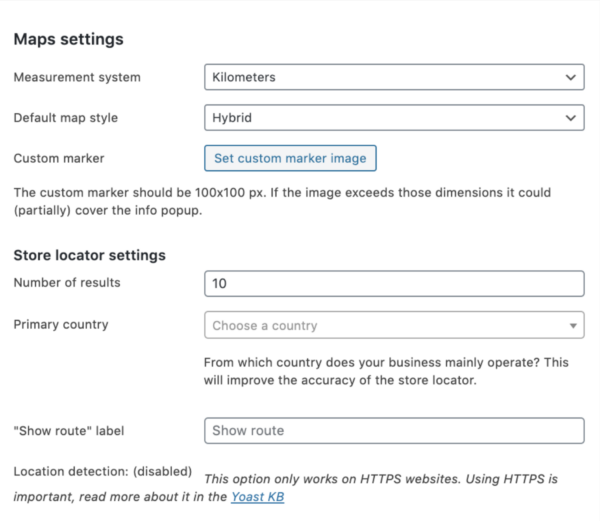
The Maps settings allow you to make changes to the maps on your site. You can set what measurement system you want to use and what the default map style should be, and you can set a custom marker.
- Measurement system: This option is used to output the measurement system when calculating distance. Choose between kilometers and miles.
- Default map style: This option specifies the default display of the map. Choose between hybrid, satellite, roadmap, or terrain.
- Custom marker: This option allows a custom map marker to display instead of the default Google map marker. The custom marker should be 100×100 px.
The Store locator settings allow you to change the number of results shown in the store locator, the primary country that should be used, and to set what should be displayed in the Show route label.
API key
On the next tab, you can enter your Google Maps API key. You need to set this API key to enable the Maps settings of our Local SEO plugin.
If you want to know more about how to create and set your Google Maps API key, you can check the explanation in this article.

Advanced settings
The last tab shows the Advanced settings. This section comes with permalinks settings, admin label settings, and enhanced search settings.
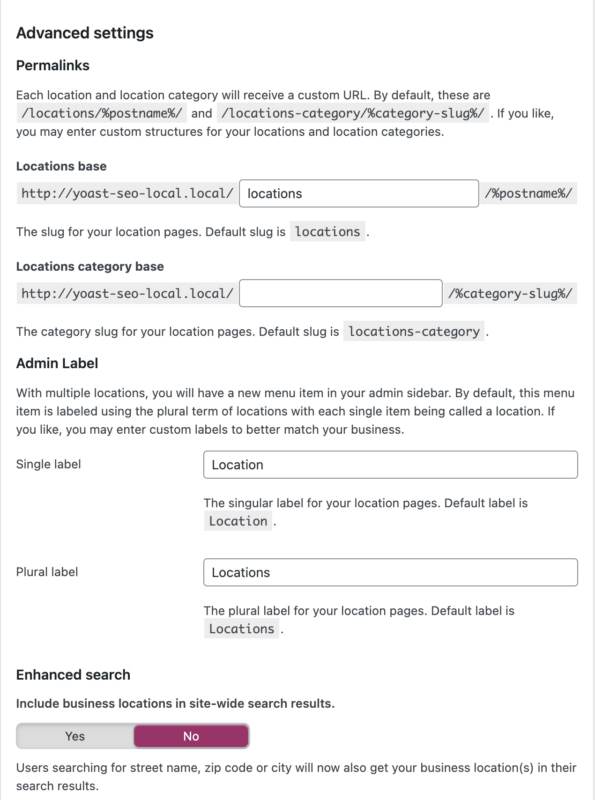
Permalinks settings allow you to enter custom permalink structures for your locations and location categories. Each location and location category will receive a custom URL. By default, these are /locations/%postname%/ and /locations-category/%category-slug%/.
Admin Label settings allow you to change the title of the menu item in your admin sidebar. By default, this menu item is labeled using the plural term of locations, with every single item being called a location. If you like, you may enter custom single and plural labels to better match your business.
Enhanced search settings allow you to include your business locations in the site-wide search results.
Yoast Local SEO blocks
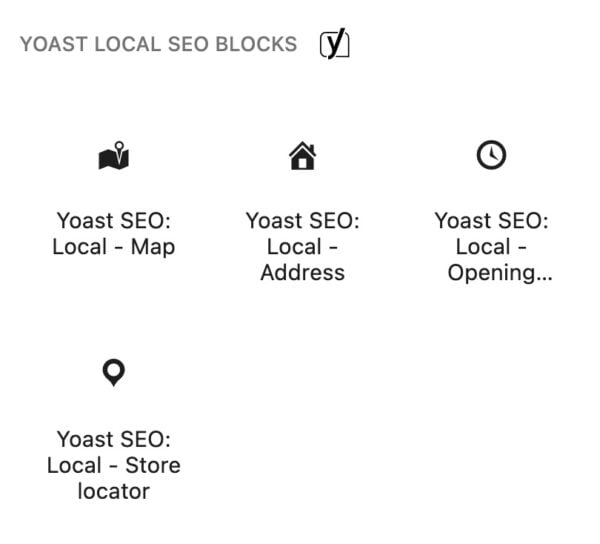
With the block editor, you can add Yoast Local SEO blocks by clicking on the + plus sign and searching for the individual blocks or scrolling down to the Yoast Local SEO blocks. You can find the following blocks: Map, Address, Opening Hours, and Store locator. These blocks are also available as shortcodes or buttons.
Submit your Geo Sitemap to search engines
You don’t have to submit the geo-sitemap to Google Search Console yourself. The plugin automatically adds it to sitemap_index.xml, so all you have to do is submit sitemap_index.xml to Google Search Console. If you have not done so, please follow the steps here in this article.
Yoast Local SEO widgets
You can view the widgets by going to Appearance->Widgets. These widgets may be used to display address details or a map. We’re using Google Maps for this. Please note that the location dropdown list will only be visible if you’ve set more than one location.
Show Address Widget
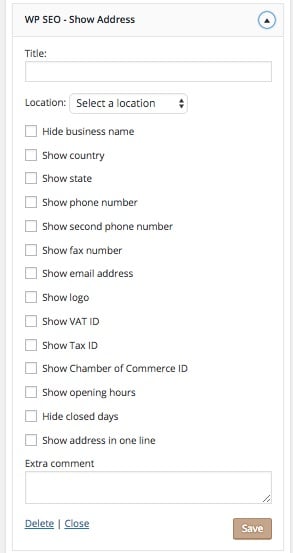
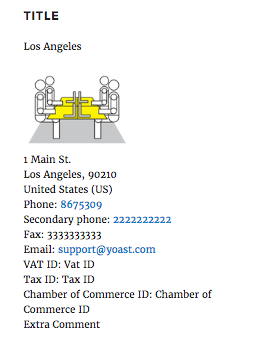
You need to select a location from the drop-down menu. The map widget allows complete customization. By selecting the boxes you can customize what is displayed. The options listed in the location widget are self-explanatory.
The extra comment section at the bottom may be useful if you have unique business information such as parking, gate entrances, or a door buzzing procedure.
Back end
Front end
Show Map Widget
The map widget controls how the map is displayed. f you have multiple locations, select a location from the drop-down menu.
- All Locations: By selecting Show all Locations, the map will show all your locations rather than the one specified in the drop-down menu.
- Map Dimensions: The dimensions of the map are controlled by the height and width options
- Zoom Level: Zoom level controls how the map is viewed. 1 is the farthest away and 21 is the closest.
- Show State, Country, URL: Enabling Show State, Show Country, Show URL in the info-window provides some additional information for users when they click on the map marker. The default info-window displays the address, city, and zip/postcode.
- Route Planner: Enabling Show Route Planner displays a route tool that users can use to help plan their trip
Default Info-Window Settings
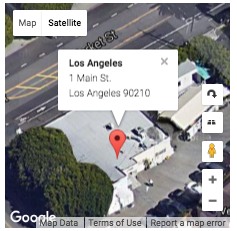
Enabling Show State, Show Country, Show URL in info-window
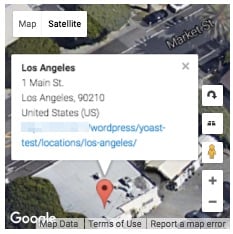
Map Widget with Show Route Planner enabled
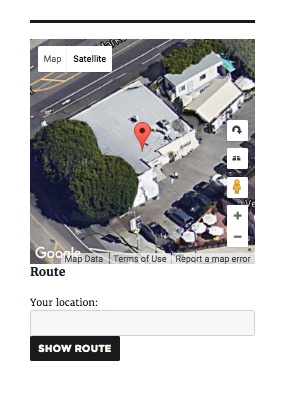
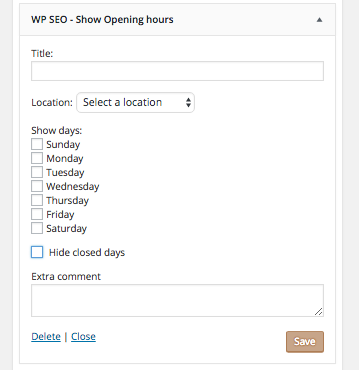
Show Opening Hours Widget
This widget shows your opening hours.
- If you use multiple locations, select the correct location
- Select the days you want to show
- Hide Closed Days should be enabled if you set your opening hours to closed. In this case, days that your location is closed will not be displayed
- Extra Comment is useful for displaying extra information about your hours such as extended hours, special hours, closing early, etc.
Back end
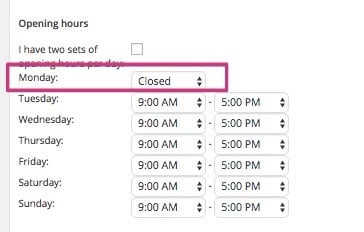
To set your hours to be closed navigate to the location and change the hours in the drop-down menu
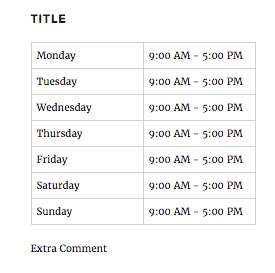
Front end
Store Locator Form Widget
The plugin comes with a built-in Store Locator that allows your customers to easily find your store. Check out this article to learn how to set it up.
Widgets with page builders
With some page builders, you may be able to embed a Local SEO widget instead of using a shortcode or a button. Consult your page builder’s plugin or theme authors for more information on how to embed a widget.
ShortCode Buttons
Map, Address, Opening Hours, and Store locator information can be added through the use of a button. These buttons will appear across all posts, pages, and custom post types in the Classic editor.

Map
When clicking the Map shortcode button the following popup will appear. If using blocks with Gutenberg the configuration options will appear on the sidebar.
If you use multiple locations be sure to select the right one from the drop-down box.

You can select and set everything the way you want. The map is also responsive, so it will resize based on your browser and screen size. You can also add the map using non-button shortcodes.
Address button
When clicking the Address shortcode button it will show the popup below. If using the Gutenberg block the configuration options will appear on the sidebar. You can also add the address shortcode using a non-button shortcode too. If you use multiple locations, select the correct one from the drop-down menu. You can also customize it to display useful information for your customers.
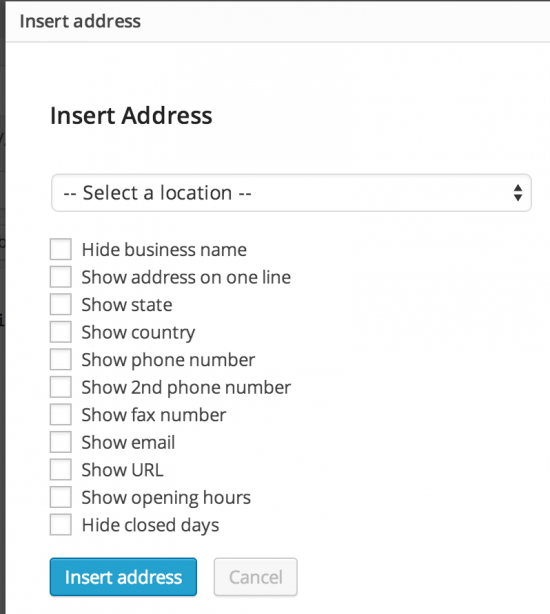
Opening hours button
When clicking the Opening hours shortcode button it will show this popup. If using the Gutenberg block, the configuration options will appear on the sidebar. You can also add the opening hours using a non-button shortcode too. If you use multiple locations, select the correct one from the drop-down menu.

Shortcodes
Actual shortcodes can still be used. Find the shortcodes you can use below.
Address shortcode
Enter this in the content of your post or page: [wpseo_address]
You can use the following options:
- id: the ID of your location. Only use this attribute when you have multiple locations and/or you’re using this shortcode on another page than the location page itself (for example your contact page)
- show_state: true/false. Default to true. Whether to show the State/Region or not.
- show_country: true/false. Default to true. Whether to show the Country or not.
- show_phone: true/false. Default to true. Whether to show the Phone number or not.
- show_phone_2: true/false. Whether to show another phone number or not.
- show_fax: true/false. Whether to show a fax number or not.
- show_email: true/false. Whether to show an email or not
- show_email: true/false. Whether to show an email address or not.
- show_url: true/false. Whether to show a url or not.
- show_vat: true/false. Whether to show a vat number or not.
- show_tax: true/false. Whether to show a tax number or not.
- show_coc: true/false. Whether to show a Chamber of Commerce ID number or not.
- show_logo: true/false. Whether to show a logo or not.
- hide_closed: true/false. Whether you want to hide your closed days or not.
- comment: Need to enter information. Any information entered between the ” ” will be displayed.
- show_opening_hours: true/false. Default to false. Whether to show the opening hours or not. When the opening hours are not filled in it will show 12:00 AM as default text.
- oneline: true/false. Default to false. Whether to show the address information in one line (true), or one line per address part (false).
Two other parameters if used will result in the business name and the business address not displaying.

- hide_name: true/false. Whether to display the business name or not.
- hide_address: true/false. Whether to display the business address or not.
Full example using all parameters: Using one “1” or the word “true” makes the parameter appear. Using a zero “0” or the word “false” makes the parameter not appear. Hiding Business Name and Address are not shown in this example.
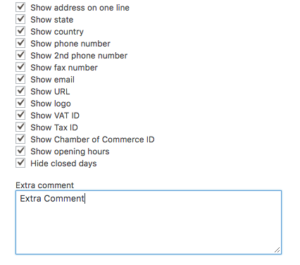
[wpseo_address id="237" oneline="1" show_state="1" show_country="1" show_phone="1" show_phone_2="1" show_fax="1" show_email="1" show_url="1" show_vat="1" show_tax="1" show_coc="1" show_logo="1" show_opening_hours="1" hide_closed="1" comment="Extra Comment"]
You can also call this function directly in your PHP code. The code below will work if multiple locations have NOT been enabled.:
if( function_exists( 'wpseo_local_show_address' ) ) {
  wpseo_local_show_address( array( 'echo' => 'true' ) );
}
You can use the same attributes as described by the shortcode. Therefore you need to pass them as an array, like this:
if( function_exists( 'wpseo_local_show_address' ) ) {
  $params = array(
    'echo' => true,
    'id' => 237,
    'show_state' => true,
    'show_country' => true,
    'show_phone' => true,
    'oneline' => false,
  );
  wpseo_local_show_address( $params );
}
Map shortcode
Enter this in the content of your post or page: [wpseo_map]
You can use the following options:
- id: the ID of your location. To show all of your locations (if you have multiple locations of course) use
allas value. To show only some locations you can use a comma-separated list of locations id’s (i.e. id=”58067,51589″) - width: number in pixels. The default is 400.
- height: number in pixels. The default is 300.
- zoom: number of zoom levels. The default is 12. A higher number means more zoomed in.
- map_style: Describes the kind of map available. Four options are available:
roadmap: Shows the Google roadmap
hybrid: Shows a hybrid map
satellite: Shows a satellite map
terrain: Shows a terrain map - scrollable: true/false. Whether to make the map scrollable or not.
- draggable: true/false. Whether to make the map draggable or not.
- show_route: true/false. Default to true. Whether to show a form field for using a route planner.
- Show_state: true/false. Whether to show the state in the info window or not.
- show_country: true/false. Whether to show the country in the info window or not.
- show_url: true/false. Whether to show the URL in the info window or not.
- show_email: true/false. Whether to show the email in the info window or not.
- show_phone: true/false. Shows the primary phone number.
- show_phone_2: true/false. shows a secondary phone number.
- show_fax: true/false. Shows the fax number
- marker_clustering: Shows the number of locations in an area when more than 1 location is in close proximity.
- default_show_infowindow: true/false. Whether to show the info window automatically or not.
- term_id: the ID of your locations category. This can be used to display all locations from a category on the map.
Full example using all the Map shortcode parameters: Using one “1” or the word “true” makes the parameter appear. Using a zero “0” or the word “false” makes the parameter not appear.
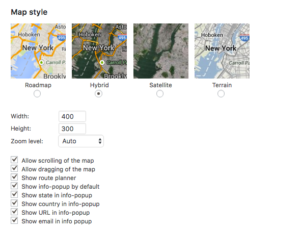
Use the shortcode below as an example
[wpseo_map id="237" width="400" height="300" zoom="-1" map_style="hybrid" scrollable="1" draggable="1" show_route="1" show_state="1" show_country="1" show_url="1" show_email="1" default_show_infowindow="1"]
You can also call this function directly in your PHP code.
if( function_exists( 'wpseo_local_show_map' ) ) {
  wpseo_local_show_map();
}
You can use the same attributes as described by the shortcode. Therefore you need to pass them as an array, like this:
if( function_exists( 'wpseo_local_show_map' ) ) {
  $params = array(
    'echo' => true,
    'id' => 347,
    'width' => 800,
    'height' => 600,
    'zoom' => 5,
    'show_route' => true
  );
  wpseo_local_show_map( $params );
}
Opening Hours shortcode
Enter this in the content of your post or page: [wpseo_opening_hours]
You can use the following options:
- id: the ID of your location. Only use this attribute when you have multiple locations and/or you’re using this shortcode on another page than the location page itself (for example your contact page)
- hide_closed: Whether or not to hide days you are closed. Defaults to 0 which shows closed days. Change to 1 to hide closed days.
- show_days: Determines which day(s) are displayed. Defaults to all days of the week. Customize by entering the preferred days in a comma-separated list. Use lowercase for the name of days.
- comment: Adds a comment to the output. This comment is visible on the front end of your site. Defaults to empty.
Full example:
[wpseo_opening_hours id="43" hide_closed="0" show_days="sunday,monday,tuesday,wednesday,thursday,friday,saturday" comment=""]
You can also call this function directly in your PHP code.
if( function_exists( 'wpseo_local_show_opening_hours' ) ) {
  wpseo_local_show_opening_hours( array( 'echo' => true ) );
}
You can use the same attributes as described by the shortcode. Therefore you need to pass them as an array, like this:
if ( function_exists( 'wpseo_local_show_opening_hours' ) ) {
  $params = array(
    'id' => 237,
    'hide_closed' => false,
    'echo'=> true,
    'comment' => ''
  );
  wpseo_local_show_opening_hours( $params );
}
Shipping method settings
WooCommerce 7.4 introduced a new local pickup feature. That’s why the local pickup option in Yoast Local SEO will soon be deprecated. If you’re using the local pickup feature in Yoast Local SEO, switch to the WooCommerce option. Find out how to switch from the local pickup feature in Local SEO to the new WooCommerce option. You can find the shipping method settings by going to: WooCommerce>Settings>Shipping>Local Store Pickup.
Single location
If you have configured only one location in your Local SEO configuration the screen looks like this:
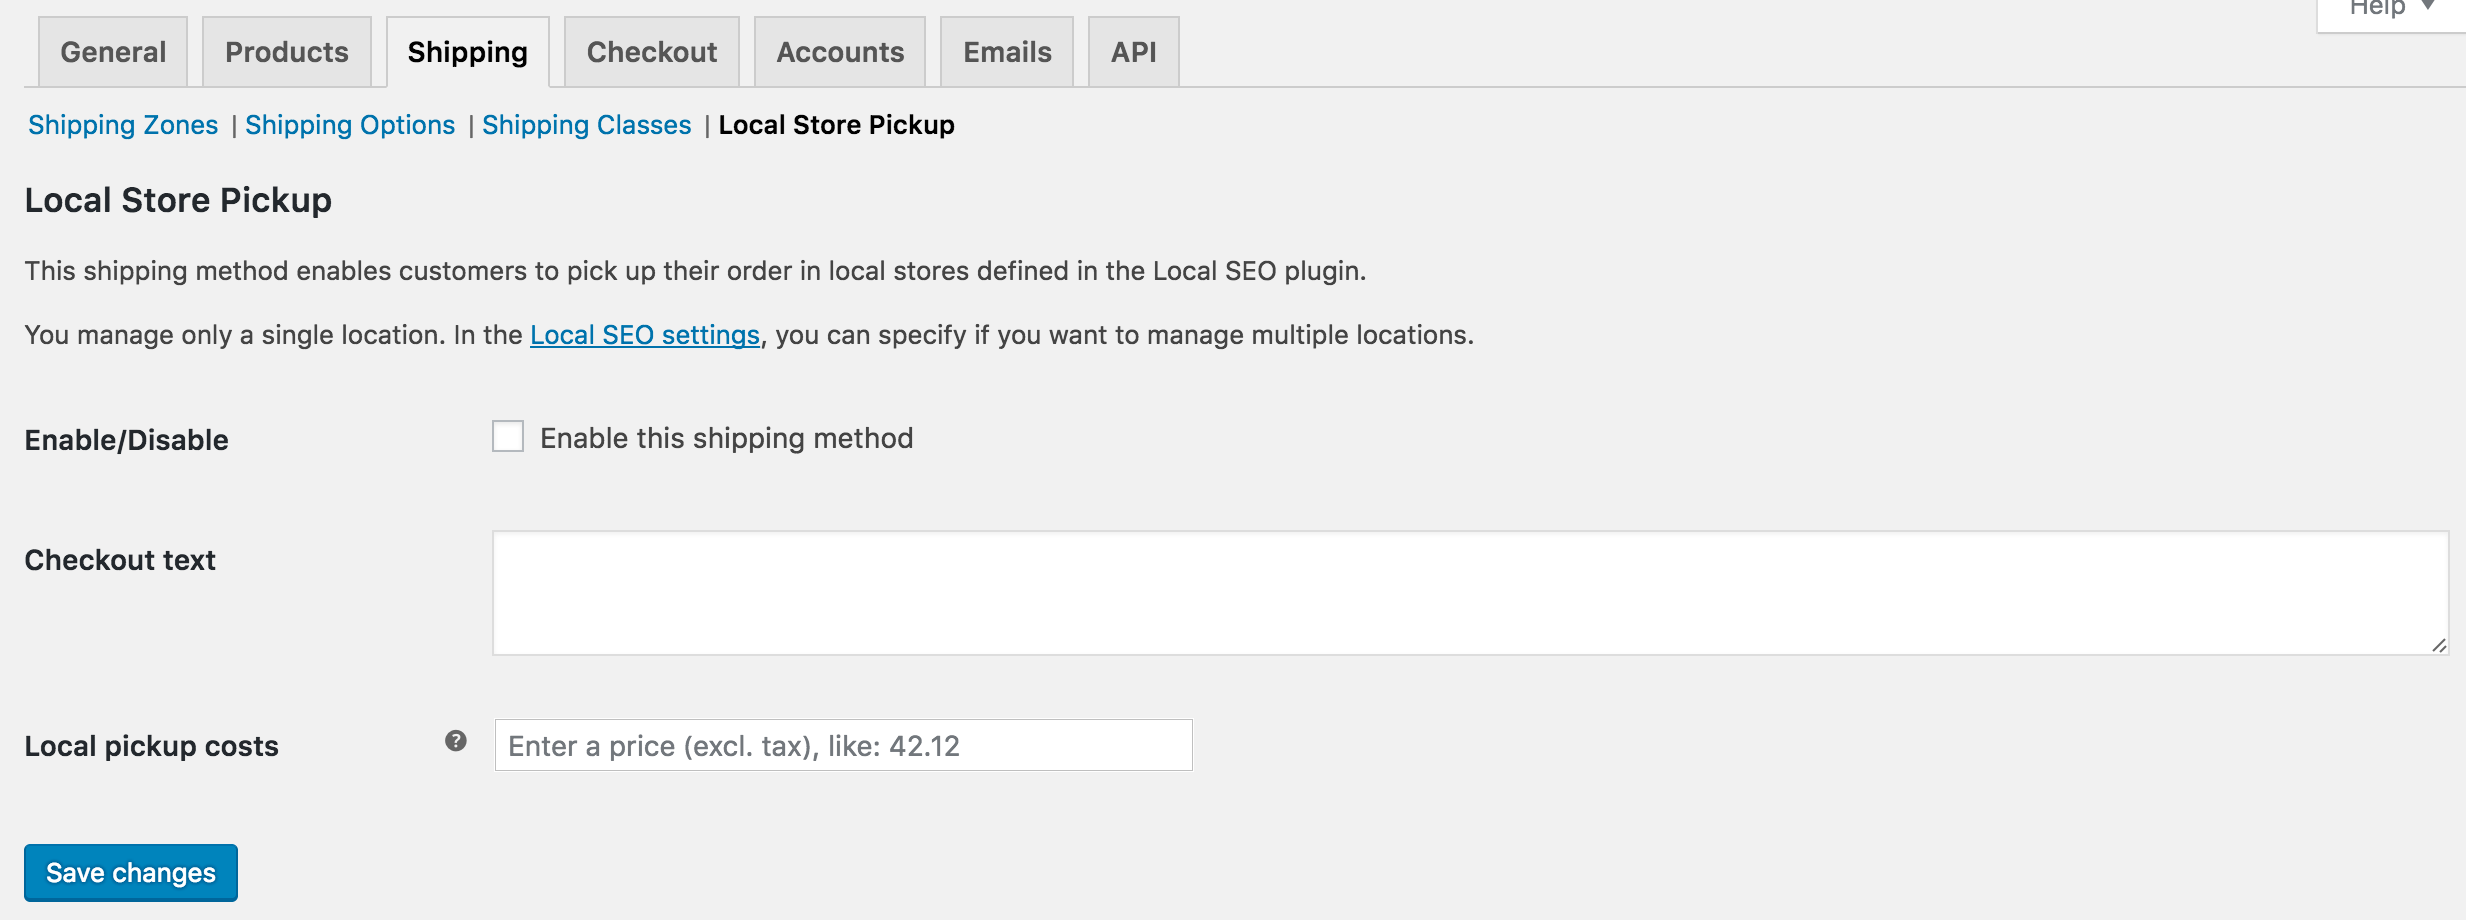
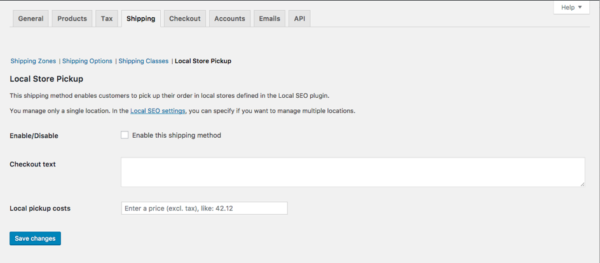
- Enable/Disable: this lets you activate or deactivate this shipping method.
- Checkout text: this is a text that is shown during the checkout process. It could provide some information for your customers on the process after the order has been completed. Like: ’You will be notified when your order is ready for pickup’.
- Local pickup costs: Sets the costs ( if any ) for shipping the order to that specific location. Use a positive floating or integer value without taxes here.
Multiple locations
If you have configured multiple locations and possibly some location categories in your Local SEO configuration the screen looks like this:
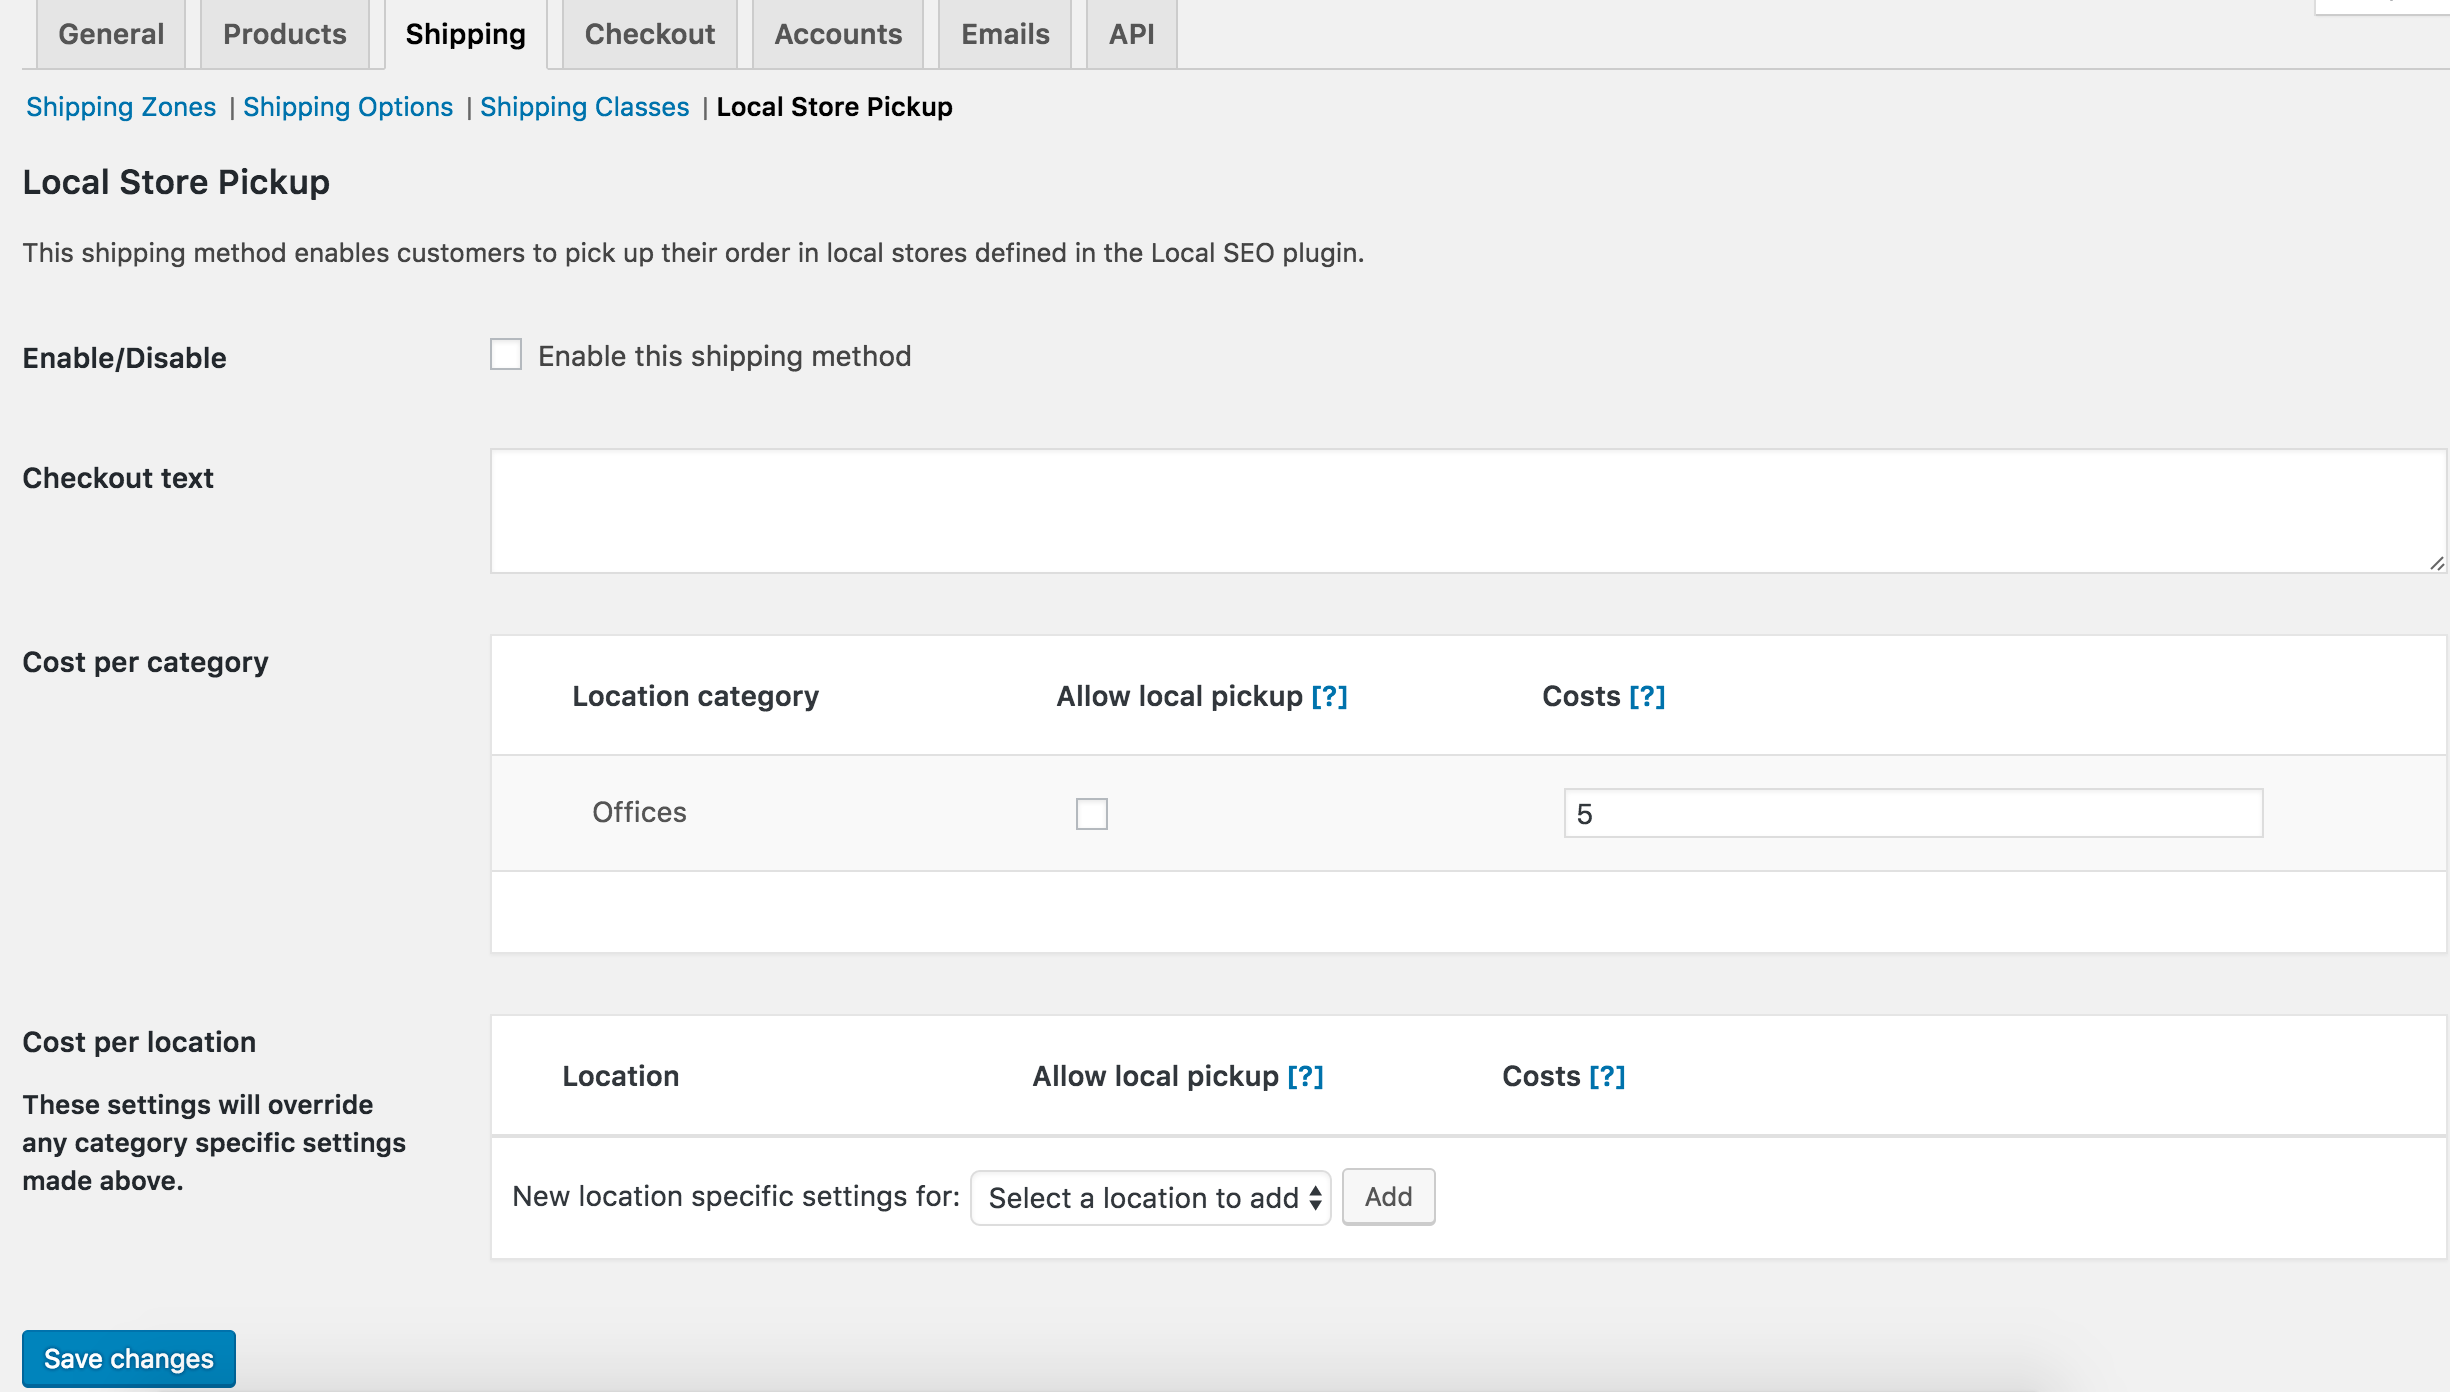
- Enable/Disable: this lets you activate or de-activate this shipping method
- Checkout text: this is a text that is shown during the checkout process. It could provide some information for your customers on the process after the order has been completed. Like: ’You will be notified when your order is ready for pickup’.
- Costs per category: enables you to activate and set the costs for all locations inside a specific location category.
- Costs per location: enables you to activate and set the costs for specific locations.
Your location-specific setting will always override the category-specific settings for that location.
New order statuses
In order to manage your WooCommerce orders properly we created a couple of new order statuses:
- Transporting: means that your order has been shipped and is currently in transport to the local store.
- Ready for pickup: this means that the order has arrived at the local pickup store and can now be picked up by the customers.
To manage this flow we created the Transport overview. You can find it here:

This overview shows a list of all orders that need to be shipped to a local store and has either one of the following statuses: Processing, Transporting or Ready for pickup.
From this overview you can update the status of a specific order to one of the following statuses: Processing, Transporting, Ready for pickup or Completed.
Once a customer has picked up their order from the local store you can set the status to Completed and the order will disappear from this overview.
New order statuses mails
Along with the new order statuses, we created a couple of extra e-mails in the order process so we can notify customers when a status has been changed. We created e-mails for when the status changes:
- From Processing to Transporting
- From Transporting to Ready for Pickup
You can configure WooCommerce e-mails settings here: WooCommerce>Settings> Email.
The checkout process
If you have enabled and configured the locations and the shipping method correctly, the location will appear as a shipping option during the checkout process.
We have altered the regular checkout process when using a local store pickup to make it more logical for our purpose.
We adjusted the following items:
- We removed the Shipping address from the overview. We don’t need it anymore since we are shipping to a local store.
- We added the checkout text which you can configure in the shipping method
- We changed the taxable address and thus the tax calculation to the address of the local store
Example:
[wpseo_address id=”237″ oneline=”1″ show_state=”1″ show_country=”1″ show_phone=”1″ show_phone_2=”1″ show_fax=”1″ show_email=”1″ show_url=”1″ show_vat=”1″ show_tax=”1″ show_coc=”1″ show_logo=”1″ show_opening_hours=”1″ hide_closed=”1″ comment=”Extra Comment”]
Developer filters
Remove Locations from the Permalink
This filter goes into the functions.php and will remove the Locations word from the permalink. If the new permalink returns a 404, please go to Admin > Settings > Permalinks and click save without altering anything. You can find the How to refresh permalinks article here.
As a best practice, we recommend taking a backup of the site prior to making any changes to it. If you are not sure how to take a backup, your host provider can help.
add_filter( 'post_type_link', 'remove_cpt_slug', 10, 3 );
function remove_cpt_slug( $post_link, $post, $leavename ) {
  $options = get_option('wpseo_local');
  $slug = ! empty( $options['locations_slug'] ) ?
  $options['locations_slug'] : 'locations';
  if ( ! in_array( $post->post_type, array( 'wpseo_locations' ) ) && ( 'publish' != $post->post_status || 'draft' != $post->post_status ) ) {
    return $post_link;
  }
  $post_link = str_replace( '/' .$slug . '/', '/', $post_link );
  return $post_link;
};
Without filter, see the Locations word in the permalink.

With filter, see the Locations word removed from the permalink.

Show Route Filter
You can adjust the size of the Route title name that appears beneath the Google Map. By default, it is set to an h3 title tag. You can change it by entering the following filter in your functions.php. Change the h3 to an h1 or h2 etc. to adjust the size.
apply_filters( 'wpseo_local_location_route_title_name', 'h3' );Filter to change business details labels
This is an example of how to change the name of a label for the contact details.
add_filter( 'wpseo_local_contact_details', 'wpseo_local_alter_contact_details', 10, 1 );
function wpseo_local_alter_contact_details( $business_contact_details ) {
	foreach( $business_contact_details as $order => $details ) {
		if( 'phone_2' === $details['key'] ) {
			$business_contact_details[$order]['label'] = 'My new 2nd phone number label';
		}
	}

	return $business_contact_details;
}
Edit Google Maps information and details
Changing the location URL in Google Maps
To change the Location URL in Google Maps, you can use the following filter tag.
yoast_seo_local_change_map_location_urlFor more information, please refer to this guide: Changing the Location URL in Google Maps.

