How to bulk edit with Yoast SEO for Shopify

Bulk editing is an efficient way to edit multiple products or content types simultaneously! With Yoast SEO, you can edit your page’s SEO metadata like SEO titles, focus keyphrases, meta descriptions, robots meta tags, and more!


Warning: Undefined array key “className” in /home/staging-yoast/staging-platform.yoast.com/versions/704fed1651beec15b007273ac5c55f4f5b94454f/web/app/themes/yoast-theme/html_includes/blocks/landing-page/block-landing-page-list.php on line 21

Need help with bulk editing?

Contact our support! They’ll be happy to help!

How to export and import your SEO data

To be able to use the bulk editor in Yoast SEO, you’ll need to export your data, edit it and then import it back. To learn how to do that, follow these steps.

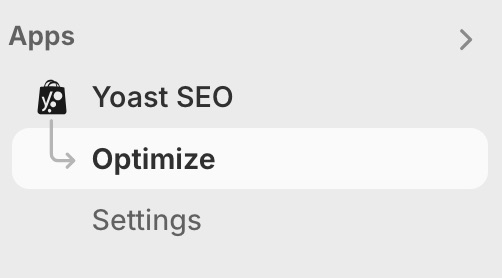
  1. Open the Optimize tab in Yoast SEO for Shopify.

    You’ll find the Optimize tab in the sidebar, under the Аpps item.

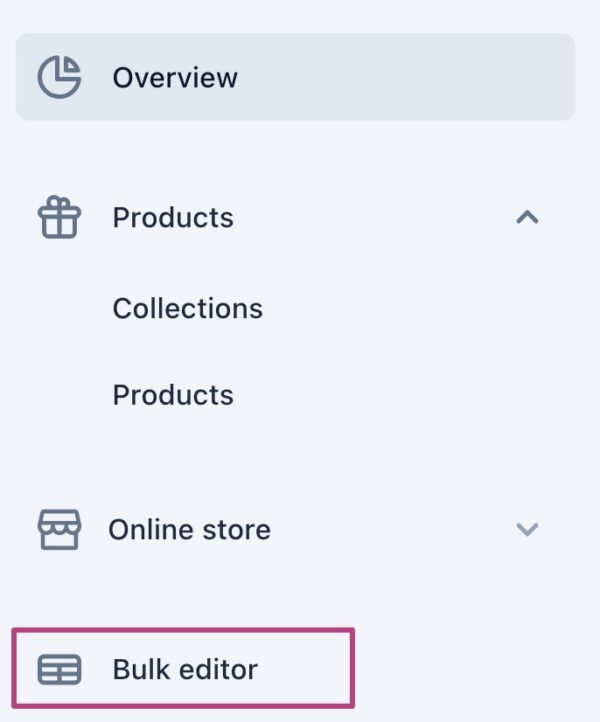
  2. Click Bulk edit.

    The bulk edit screen will open.

  3. Click the Export SEO data button.

    You’ll automatically download a CSV file with all the SEO data.

    Note: If you are using Firefox, the export may be blocked by the pop-up blocker. To allow the export, do this:
    – Go to Firefox’s hamburger menu (the three horizontal lines in the upper right corner).
    – Click Settings.
    – Click Privacy and Security.
    – Scroll down to the Permissions section.
    – Untick the box “Block pop-up windows.” You can also click Exceptions and add an exception just for Shopify if you prefer that.

  4. Open the CSV file.

    A CSV is a special format that you can open with Excel or Numbers (Mac). If you use Numbers, the file will be formatted correctly (see screenshot below).

    In Excel, your file may not get displayed correctly, to fix it follow these steps:
    – Once the file is downloaded, open a new Excel file and navigate to Data.
    – Click on Get Data (Power Query) in the top left corner.
    – Select Text/CSV.
    – Click Browse to find the downloaded file.
    – Click Next.
    – Click Load.

  5. Edit the CSV file.

    The CSV file consists of various columns. Do not edit the order or the names of the columns! Otherwise, when you import the file back to Shopify, Yoast SEO won’t be able to recognize the values. You can use this list to see how to properly insert the values.

  6. Save the file.

    In Excel, you can easily save the file by going to File and then Save.

    If you are using Numbers, you will need to do the following:
    – Click File -> Export to.
    – Select CSV.
    – Click Next.
    – Name the file and choose the destination folder.
    – Click Export.

  7. When you are done editing, you can import the SEO data by uploading the CSV file.

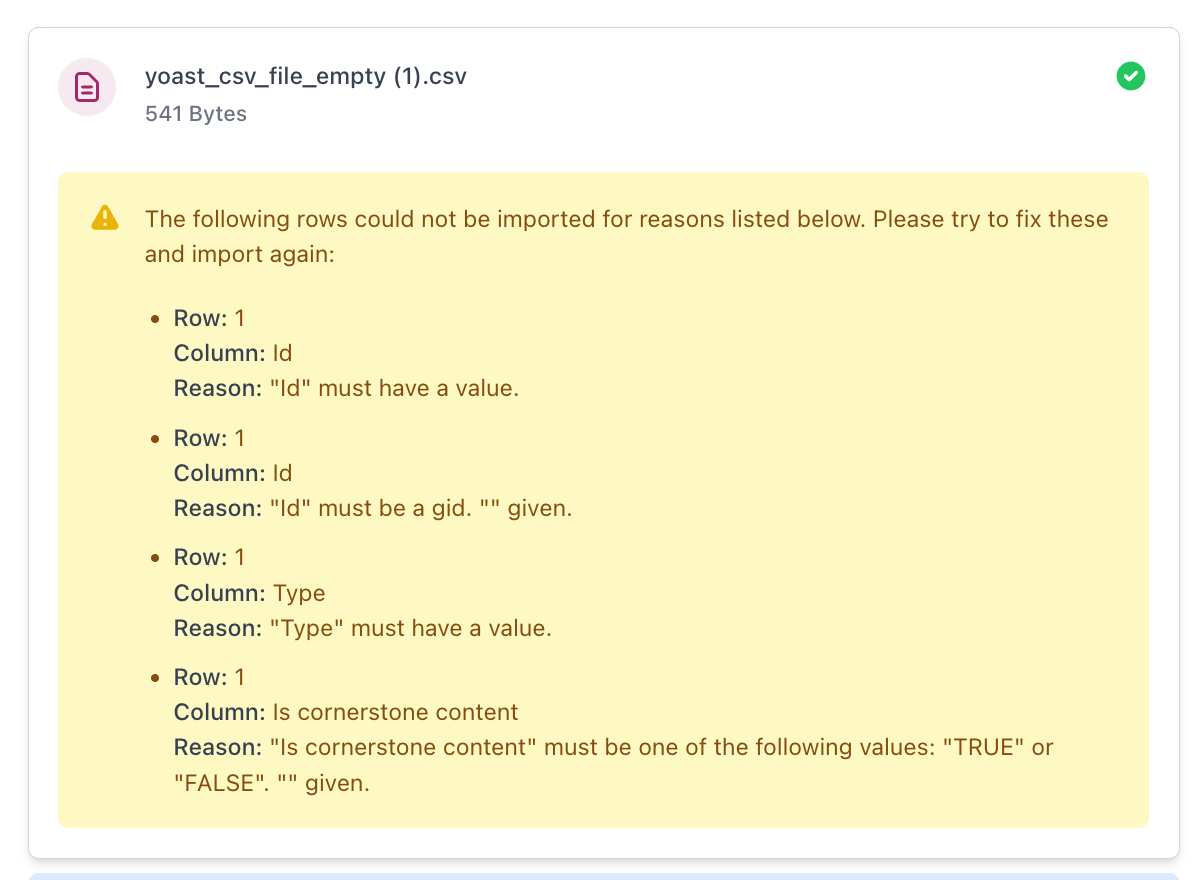
    A modal appears showing the upload process. When the import is done, you will see a notification. If there were any errors during importing, Yoast SEO will tell you what those errors are. Then, you can edit the file according to the feedback and import it again.

  8. Check the data

    Note: When you import your data, you will see gray traffic lights for the edited content in the Optimize screen. But don’t worry. After visiting a product in the editor and returning to the overview the SEO and Readability traffic lights should display the correct colors again.

    You can check if the SEO title, meta description, and focus keyphrase were implemented correctly in the overview screens for each type in the Optimize tab in Yoast SEO.

Did this article answer your question?

Thanks for your feedback!

Warning: Undefined array key "product_id" in /home/staging-yoast/staging-platform.yoast.com/versions/704fed1651beec15b007273ac5c55f4f5b94454f/web/app/themes/yoast-com/html_includes/partials/sidebar-ad.php on line 33

Get free SEO tips!